No nonsense LPG sensor
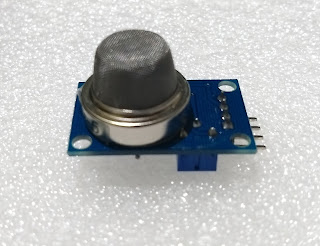
Since last week there seems to be some faint LPG smell in the kitchen, which only my wife and mom can sense. So the request (read it as *order*) came to do something about it. The smell was present only when the stove was ON. It was very faint, may be the hob needs a service. I had a gas sensor MQ-05 in my collection.I decided to make an LPG sensor and install it in kitchen as an interim solution.
The sensor gives a reading of about 200mV when in steady state and it takes about 40 seconds to reach there. In my case it starts off at around 1.04V and goes down to 200mV. These sensors have a heater which takes sometime to heat up, and till then the readings are not reliable. The sensor board I had has a preset, and I have set it to trigger at 1.1V so that it does not start buzzing every time power comes back up after a few minutes of outage but is sensitive enough to detect a gas leak from where I have it plugged in.
The sensor draws ~120mA so initially I thought of putting an attiny to control the whole thing so that I can power the sensor ON periodically and take readings. I figured out that it take about 30 seconds to settle, so i decided to just use the digital out and wire a buzzer directly to it. Maybe when I get time, I will wire it up with an ESP8266 or so to log the data to my home automation system. For now, this is enough to tick the check list given by the home ministry ;-)
MQ-05 has an active low digital out which will be 5V when not triggered and goes to zero when triggered. So I had to invert the output. I used two BC548 to trigger the buzzer when the output goes low. This is what the circuit looks like.


The sensor gives a reading of about 200mV when in steady state and it takes about 40 seconds to reach there. In my case it starts off at around 1.04V and goes down to 200mV. These sensors have a heater which takes sometime to heat up, and till then the readings are not reliable. The sensor board I had has a preset, and I have set it to trigger at 1.1V so that it does not start buzzing every time power comes back up after a few minutes of outage but is sensitive enough to detect a gas leak from where I have it plugged in.
 |
| Sensor Goes to ~1.04V and comes down to ~200mV in about 20 secs |
The sensor draws ~120mA so initially I thought of putting an attiny to control the whole thing so that I can power the sensor ON periodically and take readings. I figured out that it take about 30 seconds to settle, so i decided to just use the digital out and wire a buzzer directly to it. Maybe when I get time, I will wire it up with an ESP8266 or so to log the data to my home automation system. For now, this is enough to tick the check list given by the home ministry ;-)
MQ-05 has an active low digital out which will be 5V when not triggered and goes to zero when triggered. So I had to invert the output. I used two BC548 to trigger the buzzer when the output goes low. This is what the circuit looks like.

The circuit takes ~137mA at 5V. Used a USB male adapter removed from a USB to micro usb cable to power the circuit. I (like everybody else) have a lot of mobile chargers at home so the idea was to use one of those and install this on a wall outlet in the kitchen. For such a simple circuit designing a PCB and milling it seemed an over kill so used a general purpose board.

Next up was making a case for the whole thing. Used Fusion 360 to design a case, made a draft print to check the position alignment etc. Corrected a few things and made a proper print.
The files are shared at https://a360.co/2HGwhtG


Assembled everything into the case and installed it in the kitchen.


A Sunday evening well spent!


Comments
Post a Comment